Digging your own clay – too much hassle or a whole lot of fun? We hear from Ruby Taylor of Native Hands about how to source your own clay, as she does for her wild pottery courses in Sussex. Over to her from here…
One of the things that makes our Wild Pottery courses ‘wild’ is that we dig our own clay from the land.
What is clay?
Ask this of anyone and they’ll most likely reply ‘mud’. But there’s a bit more to it than that. It’s made up of one or more clay minerals with traces of metal oxides and organic matter. Clay minerals are formed over long periods of time, mainly through a gradual weathering process of igneous rock and through hydrothermal activity.
Clay has been formed for millions of years, since the time of the glaciers. No clay deposits are exactly the same and, typically, mineral clays are mixed in various proportions.

Credit: Native Hands
Clay deposits which remain in the place they were formed are called primary clay. Clay which moves from its original location by water erosion is known as secondary clay. Clay deposits are generally associated with what are called ‘low energy depositional environments’ such as large lakes and marine basins.
Clay versus dirt
If you’ve ever stepped into a river or lake that has a muddy bed and felt those soft clouds of mud come up around your feet, and the soft mud squelch up between your toes, you’ll know how fine silts can be.
Clay particles are about 20 times smaller than silt. Clay is made up of tiny platelets; when you mix clay with water and manipulate it, these platelets slide over one another and make the clay plastic. Silts, on the other hand, are crumbly in texture. Many naturally occurring deposits include both silts and clay.

Credit: Native Hands
Depending on the soil’s content in which the clay’s found, and how much weathering it’s endured, clay can appear in various colours from white to dull grey or brown to deep orange-red. Near where I live in Sussex, I’ve also dug clay that’s yellow, and once I found a seam of clay that was duck-egg blue. It’s iron that gives this range of colours and turns the clay terracotta colour when fired, due to oxidisation of the mineral.
Where to dig
First things first – you must find your clay. Here in the Low Weald of East Sussex, the clay is iron-rich and plentiful. Ask any local gardener (though they won’t thank you for reminding them).
Sometimes clay is close to the surface (ask the gardener); in other places you need to dig down quite deep. If you’re out walking when the ground is wet and the path is slippery, chances are that you’re walking on clay.

Credit: Native Hands
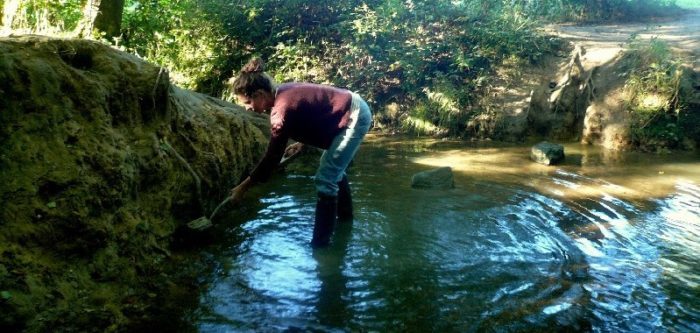
You can also look for clay in lakes, ponds, streams or even at the seaside in some parts of the country. You might find it at sites where road workers and builders have dug down. If there are any historical brickworks in your area, that’s a good sign.
A geological map of your area will indicate where there are clay deposits, and the British Geological Survey is a good place to find this information.
Remember – legally, you must always get permission from the landowner before you dig.
But is it any good?
Not all clays are equal. Some clay is good for making bricks but no good for making pots. And some initially promising clays turn out to be difficult to work. Although there’s a simple test that will give you an indication of the clay’s usefulness (see below), it’s only by trying it out and then firing it that you’ll know for sure. Here are some guidelines about the clay you may find:
Clay can be found wet or dry or in any stage in between, and remember that it comes in a range of colours.
In its dry state it may look like rocks, or even have a slate-like appearance; in its wet state, it’s like mud.
If you find dry lumps, scrape it with a knife. If it’s clay the fine particles will crumble off. Scrape some of this into a small pile, dampen it with water and see if it dissolves. Then make a small ball from some of the crushed lump mixed with water and notice how it feels- if it feels sticky, it’s got at least some clay in it.

Credit: Native Hands
The test
Take a small lump of the damp clay material and work it into a soft ball with your fingers. Roll it into a thin sausage and then bend this around your finger. If it cracks and doesn’t bend easily, it’s not worth bothering with. But if it stays together and feels smooth and plastic… you’ve found clay!
Wild Pottery & Wild Basketry courses for adults and families are held regularly in Sussex woodland led by Ruby Taylor. Ruby’s wild pottery courses have been featured in Wild Times, the Guardian, and are recommended by National Geographic. A version of this article first appeared in The Bushcraft Journal Magazine and can be found here on the Native Hands blog.
 About the author
Ruby Taylor of Native Hands has been a maker since she was knee-high, and a teacher for over 20 years. She runs popular courses in Wild Basketry and Wild Pottery using foraged materials in the woods. She has experience of a wide range of basketry techniques and also works as part of a team teaching ancient crafts and technologies.

