Fences - introduction
“Good fences make good neighbours.” – Robert Frost
Contents
What are fences?
Fences are reasonably permanent constructions to demarcate a piece of land – usually to keep livestock in or out (or to keep wild animals like deer or rabbits out).
The most common / standard type of fencing is agricultural sheep fencing that comes in 50m rolls from agricultural merchants. The mesh is strained between strainer posts, with smaller intermediate posts in between, and maybe a line of barbed wire across the top. It’s sheep-proof, and it works for other livestock too (but it’s not recommended for horses, which might get their feet caught in the mesh – they can be kept using fences of strained wire only).

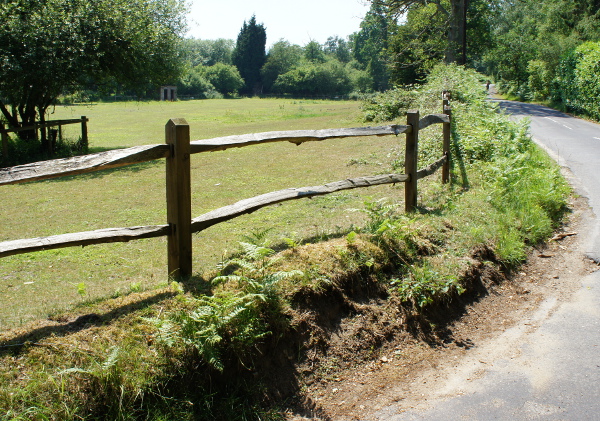
There are other types of fences. Post and rail fencing (see main image) can be used for horses or cattle. It looks beautiful, but it’s more expensive and limited as to what it can keep in or out – it’s no good for sheep, chickens, rabbits or deer, for example.
If you’re planting trees and want to protect them from deer, deer fencing is even easier. It’s plastic, 2m high, comes in 100m rolls, and can be tensioned by hand (see ‘what can I do?’). It can be taken down and re-used when the trees are big enough to be safe from deer.
Chicken wire can be easily installed and the bottom end buried – for keeping chickens or rabbits in their runs or out of the veg patch.
Electric fencing can be a temporary alternative to putting up a fence. It can be moved around, which is good for mob grazing.

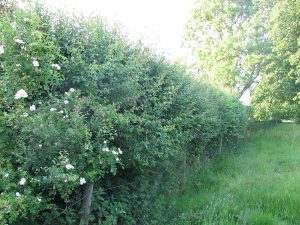
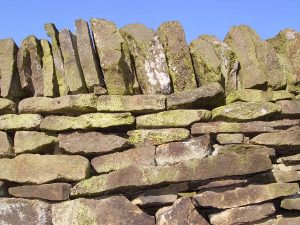
Alternatives to fencing include hedges and dry stone walls, but fencing is much cheaper, easier and faster.
What are the benefits of fences?
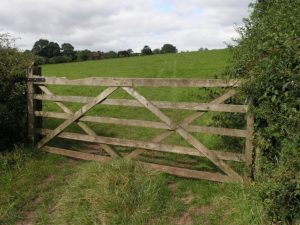
Fences delineate the borders of your land, and prevent your livestock from wandering onto roads etc. However, make sure that you don’t fence across open-access land or public rights of way – or if you do, you’ll have to install a stile so that people (but not animals) can climb over the fence.
Fences can protect baby trees, by keeping deer out (see above), although in some cases (irregular or small areas), it might be cheaper and easier to put deer protectors around individual trees.
What can I do?
Fence posts: people have grown their own larch posts, but they don’t tend to last very long (around 6 years). The standard fence post is tanalised softwood (pressure treated with a copper solution and arsenic), that bugs won’t eat, so it doesn’t rot easily. They can last for over 15 years.
Here’s how to put up standard sheep fencing (or just strained wire for horses), which is extremely sturdy and easy to install. Two people can erect 100m of fence in a day, with a ‘straining post’ at each end, and around 45-50 intermediate posts. It’s not difficult, and apart from the usual smallholding or DIY tools, you’ll need a ‘monkey’ fence strainer, fencing pliers and a metal bar. You’ll get a feel for it quickly, but nevertheless, you should probably help someone else put up a fence first, so you get the hang of it. Here’s the general idea:

- First install the straining posts at the end of the fence run. Dig a hole around 1m deep (straining posts are around 13cm in diameter, so the hole needs to be quite a bit bigger than that. Drop the post in and pack around it with stones, then fill in the gaps with soil. Check that it’s upright with a spirit level.
- Then attach the bracing post – a smaller post, the same size as the intermediate posts – to the straining post, on the fence side, at a 45º angle to the straining post. Dig a hole for the bracing post, and put a rock in it. The bracing post sits against the rock; cut a little nick into the straining post, and hammer the pointed end of the bracing post into the nick, then nail it in place. Do the same with the other straining post.

- Then run a band line between the straining posts. A band line can be purchased from agricultural suppliers – it’s elasticated, which is important, so that it pulls tight into a straight line to mark the line of the fence between the straining posts.
- Put in intermediate posts every 2.5m – you can use a post-driver (see image) – it’s a bit of ‘green-gym’ (if you’re not feeling up to that, you can get drivers with a motor, or as tractor attachments). Posts are around 1.7m tall and 5-8cm diameter, rough sawn, and also tanalised. Ensure that they’re upright, with the outside edge in line with the band line, where the wire is going to be. When they’re all in, you’re ready to attach the wire.
- You can get 100m of sheep fencing, but this is very heavy, so for a 100m fence, you could buy two 50m rolls and splice them together.
- Start at one end (the least accessible end, because you’ll need more space at the other end to do the straining) – staple the bottom strand of the sheep netting to the straining post firmly – all around the post, so that the loose wire at the end can be twisted into the fence (use large staples for the straining posts – 3-4cm).
- Roll out the netting along the fence line. It will fall flat on the ground, but don’t tread on it, and when it’s rolled out, prevent it from rolling back up by pinning the end to the ground with a garden fork.
- If you’re using two 50m rolls for a 100m run, splice the second roll to the first by overlapping one set of squares, then twisting the spare ends of wire on each roll into the netting – it’s pliable and can be done by hand. When they’re spliced together, roll the netting out to the second straining post (you don’t want to splice more than three 50m rolls together, as it will be too difficult to tension.

- Now’s the time to use your ‘monkey’ fence strainer – a ratchet handle with pivoting jaws that grip the wire (see image). Fix one end to something solid, like a tree, metal bar hammered into the ground, or a vehicle towbar.
- Using the handle of the monkey strainer (see video), move the jaws along the wire (the wire passes through the strainers). Keep going until the strainers won’t pull the wire any more – that’s enough tension.
- Next is the most delicate part of the operation. You need to transfer the tension from the strainers to the fence, by firmly stapling the tensioned wire to the bottom of the straining post. Firmly hammer a staple over the wire into the post, then put another one about 5cm from the first, which will make the wire curve around the post. There’s a danger of snapping the wire here, so take care. When these staples are firmly in, you can take the tension off the strainer. Then all the tension is being held by 2 staples, so quickly bend the wire around the post and put in more staples – then you’re safe.

- Stand the fence up and put staples over the top wire into a couple of intermediate posts, somewhere in the middle of the run (don’t hammer the staples all the way in, so that the wire can move).
- Then manually tension the rest of the wires (about 8), at both ends, with fencing pliers (see image). In the neck of the fencing pliers, there’s a place to grip the wire. Then put the head of the pliers against the post and pivot, which tensions the wire. When it’s tight enough, the second person hammers in a couple of staples. Start at the bottom and work up, but don’t over-tension as it will loosen the other wires.
- If there’s absolutely no room to strain the wire onto the straining post, you can leave up to 3m that can be filled in later with intermediate posts and 9 x 4cm timbers.
- Once the strands are all securely attached to the straining posts, you can then staple the wires to the intermediate posts (3 staples per post – top, bottom and middle). You can use small staples (1-2cm) for the intermediate posts. Don’t go all the way in with the staples – allow the wire to move through them, because the wire will expand or contract with the temperature. On hot days, it can expand and become slack – and the opposite on cold days.
- The land probably won’t be completely flat. If there’s a mound, lift the fencing wire and staple the top strand first. If there’s a dip, push down the bottom strand, and staple that one in first. Bear in mind that if it’s a very uneven field, this will increase tension, so don’t tension on the straining posts too much – allow some slack so that you can raise or drop the fence to fit the landscape.
- Now the fence is up, with a straight line of posts following the contours of the land, you can put a line or two of barbed wire at the top of the posts for extra sheep-proofing.
For a post-and-rail fence, the posts can all be the same size, and you don’t need to brace any straining posts. Install the end posts first, and make a line, as above. Don’t put all the intermediate posts in at the same time – do them one at a time, to ensure that the crossrails fit. They can be fixed in place with brackets and nails or screws, or if they’re going to fit into a hole in the post like a mortice & tenon joint, they have to be put in place before the post is fixed.

Deer fencing can be fixed to posts 3-4m apart, and tensioned by hand, without straining posts. It will keep out roe deer, but maybe not muntjak, which might burrow underneath – in which case you can run some chicken wire along the bottom, attached to the same posts, but buried into the ground.
Specialist(s)
Thanks to Nagakusala Dharmacharin of Treesponsibility for information.
The specialist(s) below will respond to queries on this topic. Please comment in the box at the bottom of the page.

Nagakusala set up Knott Wood Coppicers in 1994, managing a local woodland. This became a workers co-op in 1997, and the following year set up Treesponsibility as a multi-stakeholder group seeking to reforest Calderdale and neighbouring areas. Members of Knott Wood Coppicers continue to manage Treesponsibility, planting trees and managing woodland across a wide area, including management interventions into woodlands we planted 20 years ago.



2 Comments
Fantastic article, I find very useful. If you ever require the services of <a href=”https://fastfixfencing.co.uk/stock-fencing/”>Stock fencing</a> then please do reach us out we’ll be more happy to help.
Fantastic article, I find very useful. If you ever require the services of Stock fencing, then please do reach us out we’ll be more happy to help.