Papermaking - introduction

“The invention of paper greatly helped the spread of literature and literacy, making books cheaper and more convenient to use.” – Ancient History Encyclopedia
Contents
What is papermaking?
Papermaking is the art of making a thin, flat sheet of material by pressing together cellulose fibres derived from plants, textiles or wood. Hand-made paper can be used for writing, printing or painting on, in sculpture and decoration or given as a gift.
History
The word paper derives from papyrus, a wetland plant that was used as a writing surface from the time of the ancient Egyptians. However, the structure and means of production of papyrus differ from true paper as we know it today. Ts’ai-Lun, a eunuch at the Chinese Han Emperors’ court, is normally credited with inventing true paper in the year 105 by pulping old hemp fishing nets and parts of plants such as the paper mulberry tree. However, recent research has turned up possible examples of fibrous paper over 2000 years old in the Baqiao township near Xi’an in China (where the terracotta army was found). Therefore, it’s probably more accurate to say that Ts’ai-Lun was the first to make paper into a commercially viable product.

Above: nettle tops ready to be cooked. Below: cooked nettles.
The Chinese initially attempted to keep papermaking techniques a secret from the rest of the world, but they eventually reached Korea and Japan, where they were further refined. However, the knowledge didn’t arrive in the West until a battle in Samarkand (in modern-day Uzbekistan) in 751 when Arab troops captured some Chinese soldiers who were papermakers, and subsequently set them to work. Papermaking travelled slowly along the Silk Road towards Europe where the Moors introduced it in 12th century Spain. From there it spread across the continent, arriving in England around 1450. The availability of sources of fibre, and the increasing demand for writing materials – driven by rising literacy rates and the invention of moveable type – eventually saw paper overtake other materials such as parchment or vellum (both animal products).
The invention of mass production methods in the 19th century, the introduction of wood pulp instead of rags and the ability to produce long strips of paper (rather than individual sheets) contributed to the decline of hand paper making. The art might have died out altogether but for the paper maker and historian Dard Hunter who extensively studied and revived the craft in the 1930s. Today papermaking is kept alive by a relatively small number of artists, craftspeople and teachers in the UK and is a popular choice for craft courses and workshops. Apart from its obvious use as a writing surface, hand-made paper is used by a number of artists for painting, printing, decoration or even sculpture.
Video of the entire papermaking process.
What are the benefits of papermaking?
Making your own paper means you can recycle household surplus or even paper that you’ve made previously. You can keep going until the fibres get too short to bind. You can take advantage of normally unwanted garden weeds or less desirable plants. (Obviously if you’re picking plants away from your own garden make sure you have permission if necessary and that you know exactly what you’re picking – i.e. nothing endangered or vulnerable.)
Although you do need large amounts of water, it can be saved and reused again and again during the pulping process. The nastiest material that you’ll find in recipes is caustic soda (sodium hydroxide), which can be toxic to aquatic life due to its high pH, although it can be neutralised easily and doesn’t accumulate in the food chain. However, its manufacture involves environmentally-damaging substances such as chlorine gas or mercury. We suggest that you use the much more benign washing soda (sodium carbonate) instead.

Paper hanging to dry, still attached to the felts.
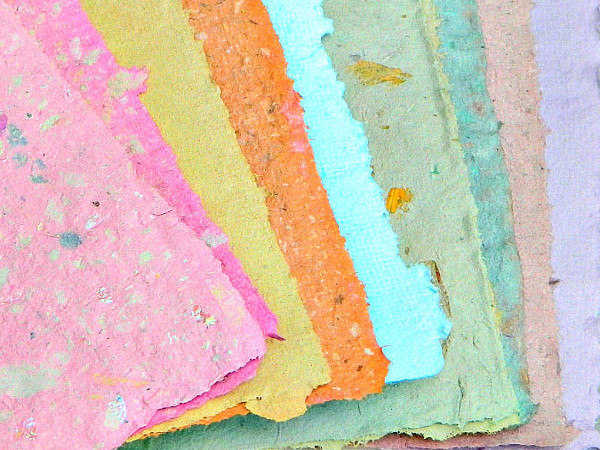
A hand-made sheet of paper is something beautiful and unique. It makes a nice gift, adds aesthetic value to art and crafts and is visually and tactilely appealing. You can personalise it further by embedding flowers or bits of printed text, etc. and different colours and textures. While it’s obviously not cheaper than buying mass-produced paper, you can certainly make your own cheaper than the same thing from a speciality retailer, which can set you back as much as £10 for a nice artisan sheet.
Papermaking is suitable for all ages, and kids particularly love it: it’s messy, colourful, fun and involves sloshing large amounts of water around – what’s not to like? It’s easy to learn and most people who try it for the first time will have something to show for it at the end of the day. If you decide to take it further and start manufacturing at home, the quality of your paper will depend on how much time you put in to perfecting and refining your technique.

Papers made from daffodil leaves with added cotton fibres.
What can I do?
Preparation
To get started you can attend a course or workshop, or learn from books or online tutorials. There’s lots of information out there on which plants and materials work best etc. You don’t need a lot of expensive equipment and can pick up things up from hardware or charity shops or even scrounge them from around the house. Basically you need:
-
Pulping: a (clean) cat litter tray, plastic box or washing up bowl.
-
Macerating: mallet or blender (best to have a separate one of this last; don’t use the same one for food).
-
Mould: made from a picture frame with fine mesh or netting stretched taught and stapled all the way round. Very fine curtains or mosquito netting are good and you can also buy special heat-shrink mesh that you shrink to fit with a hairdryer.
-
‘Felts’: household cleaning cloths, old sheets or blankets.
-
Boards for pressing out water: any old bits of wood the right size and not too porous will do.

The wispy fibrous edges of some handmade papers.
You can also buy specialised equipment, including presses, moulds and fancy deckles, from art suppliers if you want to go down that route. Pre-prepared pulps such as cotton linter (a by-product of the cotton industry, with very short fibres) are also available to buy.
Papermaking is easy to do at home as long as you have a suitable area or outside space to work in as there’s a lot of water involved. It’s a pretty safe activity but you do need to be careful as floors tend to get wet. Also take care with water around electrical items like a blender (an extra circuit breaker on the plug is advisable). Clothes get wet and messy but no special protective clothing is needed unless cooking with washing or caustic soda in which case you need gloves, goggles and a breathing mask.

A simple home-made mould and deckle.
Process
There are two basic methods of making individual sheets of paper: the Eastern (or Japanese) and Western. The Japanese method involves a bamboo screen, a bit like a table mat, in a hinged frame known as a ‘sugeta’. The Western method described here uses a similar system but with a fine mesh screen tacked to a frame (mould) and another, separate frame (deckle) placed on top to keep the pulp in place. The ragged edge produced by this method is known as a ‘deckle-edge’ and is often very desirable as an indicator of artisan production.
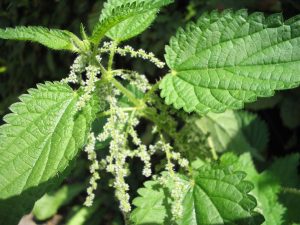
To make paper, first you need pulp, obtained from any fibrous material such as cotton or linen rags, recycled paper (but not magazines – too many chemicals in shiny paper), or cellulose obtained from the inner bark, leaves or stems of plants such as daffodils, reedmace (cattail), clematis, nettles or even bamboo if you happen to have a source close by.

You can incorporate beautiful, natural objects into your paper.
Once you’ve collected enough of your base material, cut it up into 2.5cm pieces, weigh it so you know how much you’re going to be working with, and then soak in water for a few hours or overnight. Once soaked, cook it up in hot water and washing soda until the fibres separate and it starts to looks like overcooked, stringy rhubarb. The alkaline washing soda is necessary to break down the lignin – the ‘cement’ between the cellulose and cell walls of the plants – which can lead to the paper deteriorating.
Quantity-wise, dissolve 100g of washing soda in about 8 litres of warm water per 450g dry weight fibres. The dry-weight fibres should account for around 20% of the mix and the overall pH during cooking should be between 9 and 11 (a simple garden probe can be used to check this). Once cooked, rinse the mixture in plain water and test the pH again. You’re aiming for a pile of pulp at pH 7 or neutral; the idea is to use as little washing soda as possible and still achieve an acceptable sheet of paper. Making paper from plants is not an exact science so the best thing is to use one of the many books on the subject as a guide, use your common sense and keep practising until you perfect it.
How to make a mould and deckle.
Next, macerate the pulp using a mallet or similar instrument to separate the fibres. You can also whizz up small amounts at a time in a household blender with a generous amount of water (here you’re looking to obtain a smooth, creamy consistency).
Next, place the pulp in a vat with water, dip the mould and deckle in to load it with pulp, allow water to drain out through the sieve, remove the deckle and turn the pulp out onto what’s known as a ‘felt’, which can be anything from household cleaning cloths to old sheets or blankets. If you’re making several sheets, repeat the process, placing each sheet on top of the previous one with a felt in between. Finally, place the whole lot between two boards and press hard to squeeze the water out (standing on it works). Separate the sheets and leave them to dry on a flat surface or hung on the washing line, or hang them whilst still attached to the felt. At this point you can roll the sheets out onto different surfaces to achieve different textures and finishes. For example, Perspex will give you a nice smooth texture. Hand-made paper can be very porous so if you’re using it to paint on you’ll need to finish it by sizing with a mix of natural glue and water once dry.

Christine making paper from recycled papers with added cooked and processed seaweed on the Summer Isles, Scotland.
You can create a variety of different colours using different base materials. For example, hemp is a nice creamy colour. Try picking the same plants at different times of year to see how their colour varies. You can also add colour by using coloured recycled paper or adding natural dyes like onion skins or beetroot. Special pigments can also be bought from art suppliers but obviously the more chemicals and manufacturing you introduce into the process, the greater the environmental impact.
Specialist(s)
Thanks to Christine Harrison for information.


