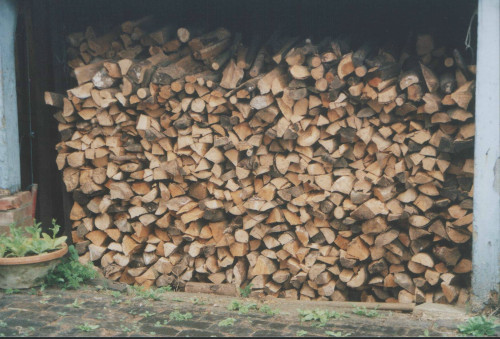
Sourcing your wood for smoking – Can be a very simple task, especially if you want to buy it online. If you’d rather enjoy a more DIY approach you can harvest wood after fresh autumn or spring winds.
Most of the wood I’ve used for cold smoking has been sourced from my own pruning. The best time for collecting wood is in the winter or very early spring before the sap rises. The sap will add moisture and a slightly bitter taste to your wood shavings due mainly to the higher resin and sap content of the wood. This can be avoided by choosing when to collect. Having said that, I have had some great success with woods harvested in the summer. So I wouldn’t hold onto this rule, but if I had a choice, I would go for the winter harvested wood.
A few years ago I bumped into a tree surgeon and his gang of lads in a café on the A10 in North London. They had a load of fantastic oak logs on their truck which had just cut down in one of the local municipal parks. I asked him if I could have a few logs and they were more than pleased to help. It didn’t even cost me a cup of tea.
Once you know which woods you can and can’t use its great fun just looking as you drive around the place to see what you can pick up for free. You may have a suitable fruit tree in your back garden or a majestic Oak or Beech. No real need to head out into the garden with an axe and sacrifice the whole tree. Its amazing how much chippings you can harvest from a decent autumn pruning session.
I have only bought wood once and that was a packet of hickory from the local DIY store. Don’t see too much hickory in middle England these days. I bought it to Hot Smoke some pork spare ribs in a kettle barbeque and I can say with authority that it was money well spent. You can see sellers from time to time on the web and on eBay selling various wood shavings. These can be very useful especially if you have difficulty sourcing your own woods where you live or you simply don’t have the time. Personally, I think there is a great deal of pleasure to be had from sourcing your own material for what is a wonderful and creative pass time.
It’s a lovely idea to think the local joinery workshop who make oak furniture will have an abundant stock of wood shavings and saw dust for your smoking. Approach with caution, unless you can absolutely guarantee the source of wood shaving is what they say it is then leave it well alone. There are a lot of joiners using MDF and pine and to have a batch of oak or cherry contaminated with either of these products will render any food you smoke as inedible at best and actually quite dangerous.
Turning wood into Chippings/Shavings – Obviously you’re going to need to create chippings if you’re going to stand any chance of lighting your wood to produce smoke. This isn’t as difficult as it sounds, and there are a few things to bear in mind when doing this. Firstly, and even before we get to the stage of making chippings your wood will have been cut from a tree.
How your wood is cut down has some relevance to how you’ll proceed with processing it to a point where you can use it to smoke food. If the wood has been cut with a hand saw, all well and good. You can get on with turning it into chips right away. If your wood has been cut down by a chain saw you’ll need to ensure any remaining oil residue from the chain saw’s automatic chain lube system has been removed. If this is not done you will effectively be smoking your produce in mineral oil. You may as well hang it behind the exhaust pipe of your car.
Ok, we have the wood and we’re ready to turn it into chippings. Now, this is where I like to know where I’m going to use the wood before I decide on how to process it. If I’m going to use it for hot smoking on the barbeque, then I’ll more than likely chip the wood using a preparatory wood chipper (available from most hardware stores). Wood chips are medium sized pieces about half a centimetre
square. After soaking the chips in water for about 2 hours they can be placed directly onto hot charcoal. As they are larger than wood shavings, they’re less likely to burst into flames and cremate your food. They will smoulder nicely (thanks to the added moisture from soaking) releasing vast quantities of lovely smoke.
If I’m going to use my wood for cold smoking I’ll go for fine chips or shavings from an electric planer. I use an electric planer connected to a dedicated industrial vacuum cleaner to collect the mass of shavings one gets from one log. The size of the shavings can be adjusted by changing the depth of the planer’s blade. It works really well and I get perfect fine shavings every time. I have used this for Pear, Apple, Cherry, and Oak so far and it’s an excellent way to collect a large amount of shavings really quickly. It’s also quite therapeutic turning a large oak log into shavings using an electric planer. Once I have all the shavings in one place I place them into a sealed plastic bag to maintain their moisture content. Allowing them to dry out can lead to then catching fire when they are lit in the smoker.
Creating smoke from your wood – The production of smoke is the cornerstone of effective smoking (no really!) and to achieve the best smoke you will need to take account of the; Type of wood Moisture content Size and form Method of burning
All these factors have a bearing on the production of smoke. Oak burns slowly while Ash is a fast burning wood. Dry wood burns faster then green timber (the term given to freshly cut wood) and is more likely to catch fire than wood with a higher moisture content. Shavings and sawdust are more likely to smoulder than
wood chips which are more likely to go out unless there is sufficient heat to sustain combustion and can catch fire easily if too much heat is present.
Type of Wood – Different types of wood will impart a variety of flavours to your produce. Alder will provide a delicate light smoke while hickory will give you a full flavour. Fruit woods are particularly popular with apple and cherry a favourite. Each wood species has slightly different characteristics and will add character to whatever you smoke. At the foot of this page there is a reasonably comprehensive list of wood varieties with their smoke and flavour characteristics. The list also provides information on which woods are traditionally used for certain foods. Moisture content of the Wood – Moisture content of the wood is important with all forms smoking because if your shavings are too dry they simply catch fire. If this happens, it is a good idea to dampen the pile of shavings with a water spray from a hand held sprayer. You can get these from your local hardware store.
Size of wood Shavings/Chips – Shavings have a tendency to smoulder really well all by themselves providing they aren’t too dry; Chips smoulder less well as they have a lower surface area to weight ratio and therefore need the added heat from the charcoal BBQ. The easiest way to imagine this is to think of setting fire to a large log weighing 50kg by using a flame the size of that from a matchstick. The log has a very low surface area to weight ratio and therefore the available oxygen to support combustion around its surface will be lower. It will be very difficult to set alight and burn. Now turn the same log into sawdust. The surface area of the dust will be huge and the available oxygen around the surface will be infinitely more abundant. The dust will burn and smoulder readily from the same heat source.
Burning method – The burning method as I term it can be very important. By burning method I mean how you physically burn the wood. In my coldsmoker for instance I use a tall thin wire mesh basket to hold the shavings in a column. I set fire to this on the top using a blow torch and allow the shavings to burn down to the base of the basket. This seems to work well because the diameter of the basket (20cm) limits the cross sectional area of the shavings allowing only a finite area of combustion at any one time. This is particularly useful in coldsmoking as heat produced during combustion can be a problem. Slow burning wood with a limited area for combustion will give a longer, cooler burn using this method. In addition to this, I have found that compacting the shavings slightly in the basket gives a slower more even burn. The up side of this is that the temperature of the smoke is generally lower and of course, I’m able to add more shavings for a given basket size which extends the time I can smoke for.
By piling the shavings into a natural cone shape, you can have it burn from the tip of the cone down and outwards to the periphery of the base. This can work if your smoke generator has a wide flat base. The only problem with this method is that you have very little control over the combustion process unless you limit the supply of oxygen to the fire. This could lead to a situation where there is a large area of smouldering with copious amounts of smoke being produced, for a shorter period of time. Suitable for lightly smoking some produce. One disadvantage of this method is the potential for heat build-up leading to flaming combustion. When this happens the products of combustion (The smoke) actually catch fire and all the constituents of the smoke that impart flavour to your food will be burnt.
Smoking food really does rely on incomplete but reliably consistent combustion. With a little experimenting (without food) one can perfect smoke production in a very short time.
Tips – Soaking the wood chips in bulk for about a day and then placing it into several bags and freezing them is a great way to have BBQ ready wood chips any time of the year.
Using wood straight after it has been cut while the sap is rising (I.e. in late spring or summer) can lead to a bitter taste from the smoke. Just allow the wood to dry out losing some of its moisture content before using it on the smoker. This will happen a lot quicker if you chip or shave the wood first.
Dry wood shavings can benefit from a light spraying of clean water about an hour before use thus allowing for the moisture to re-absorb back into the wood and preventing it from catching fire.
Thanks to Turan of Coldmoking.co.uk


