Sigi Koko of Down to Earth Design shares her tips and tricks for how to plaster straw-bale walls with clay, this time tackling the second coat.
In this post I address issues and tips for the second coat of clay plaster on straw-bale walls today. Note, I am assuming you are using clay plaster for all three layers of a three-coat application. For tips on applying the first coat of clay plaster, see my previous post here.
Goal for your second coat of plaster
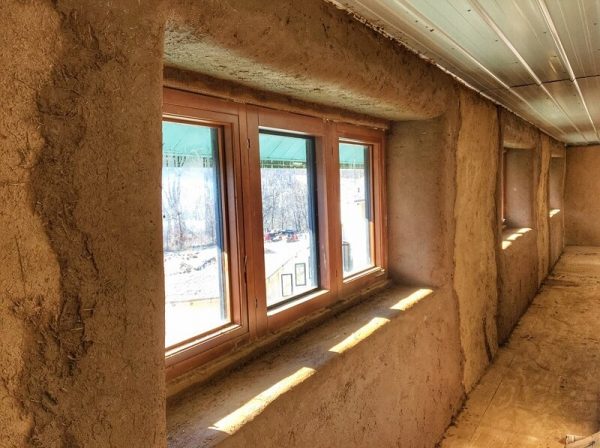
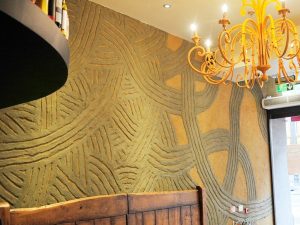
The goal for the second coat of plaster is to sculpt the walls into the desired shape. The first coat created your amazing bond to the straw-bales and your third or finish coat will create the texture you desire. This second coat is where you create the shape you want your walls to have. Your shaping/sculpting plaster is bonding directly to the first coat of clay plaster you applied, so the bond of that first coat is essential. Since your first coat usually is lumpy and bumpy, you have excellent surface area to physically key your second coat of plaster to the first coat.
With this coat of plaster, I care very much what it looks like – not how it feels, but how the shape looks. I try to minimise or avoid cracks, I work sculpted areas a lot so they look exactly how I want them to, and I spend as much time as needed to shape the wall into something that is beautiful to me. Then I’m well-prepared for a nice, even coat of finish plaster, where I can work on texture.

Transformation from first coat (left) to second coat (right). Credit: Sigi Koko
Wall preparation for your second coat of plaster
1. Work any loose spots
I go around the dry first coat of plaster and make sure there are no loose spots. There will usually be a wide, tell-tale crack if you have a loose spot at a straw-bale seam, where the first plaster was not worked in well. I also check corners, around windows, and the tops of walls, to be sure all the walls feel nice and dense and tight.
2. Make test plaster mixes
I make several test plasters and apply them directly onto the first layer of clay plaster. What I’m experimenting with in my tests are the proportions of ingredients. Since I use almost exclusively clay soils to make plasters, it means I’m using different clay each time, and each clay has different properties. So I make test areas at least 24″ x 24″ in area with varying proportions of clay and sand, and I write my proportions directly into the plaster surface. When the test areas dry, I look for the one that cracks the least and that I can press into firmly with my thumb and it is not crumbly or dust, but rather nice and firm.
3. Wet the wall down
I can’t stress this one enough, and as I mentioned in the post on first coats of plaster, this is the most common error I see: applying plasters over dry substrates! I hose down the first coat of clay plaster the evening before I plan to plaster, again in the morning, again about 30 minutes before plastering, and then continually as the wall dries out over the course of working. If the first coat of plaster is dry, the clay sucks moisture out of the second coat of plaster, and causes the bond between new clay and old clay to pop apart. When deconstructing plaster coats that have been applied to each other without dampening the substrate first, the two coats of plaster are quite distinct, and you can easily pry them apart in separate layers, like sheets of slate. Similarly to first coats of plaster, I allow time for water to saturate the clay substrate, because a water slick on the surface will cause new plaster to slide right off the wall.
Tips for your second coat of plaster
In order to maximise control over the shape of the walls as well as the quality of the plaster, I do the following:
Sifting
I use mostly clay soils to make plasters and there are often stones and large clumps in the mix. So I sift clayey-soils through a 1/2″ or 1/4″ screen to break up the soil into smaller pieces. Basically you want a screen that is slightly smaller than the thickness of plaster you intend to apply (otherwise stones will drag with your trowel against the hard first coat of clay).
Proportions
I use sand and straw, and sometimes manure, to control cracking in this second coat of plaster. The reason is because clay expands in volume when wet, which means it shrinks when it dries. Shrinking clay can translate to cracks in your plaster. Sand, on the other hand, does not absorb water and so does not increase in volume when wet nor decrease volume when it dries. So having a high percentage of sand in your mixture helps to control shrinkage of the plaster, and thus cracks. However, the clay is your binder, it holds everything together and onto the wall, so you need to be sure that your plaster has enough clay to stay sticky, otherwise your will end up with a dusty mess.
The exact proportions of sand-to-clay depend on the properties of your clay, but roughly speaking, I usually end up with between 15% and 30% total clay content, the remainder being sand. (Note that this includes any sand in your soil, if you are using clayey soil for your plaster.) The straw component helps to bridge gaps where cracks are likely to occur. I add a fair bit of chopped straw (3″ or less in length) to my second coat of plaster to provide ample structural integrity and I add additional straw when sculpting the clay or where I’m trying to fill in deep holes. Finally, I use manure whenever it is available, and it is probably my favourite additive for plasters and cob. The manure is both sticky (like the clay) and fibrous (like the straw), so you augment two properties of the plaster mixture with a single ingredient.

Applying the second coat of clay plaster. Credit: Sigi Koko
Application
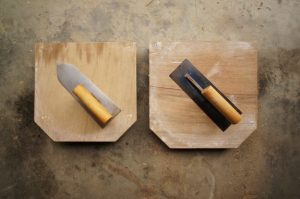
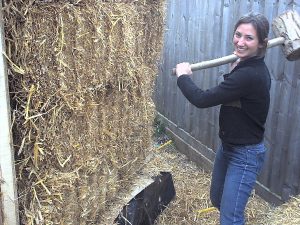
In order to control shaping the walls I use a fairly long (16″ to 18″) rigid trowel to apply this layer of plaster. Because the trowel is rigid, I can push the plaster around easily and because the trowel is long, I can create a gently undulating, reasonably flat wall surface. I find a short trowel does not let me see low spots in my wall surface as well, and I find a flexible trowel just follow the shape of that lumpy, bumpy first coat, so I save shorter, flexible trowels for finish plastering. If you have a lot of dips in your wall that you want to fill, you will want to add lots of straw to your plaster so it has more structural integrity. I also limit the thickness that I apply on any one day, and instead, fill deep spots in multiple passes. Even waiting one day before adding more plaster will allow the first batch of fill to dry enough, and bond to the first coat below, to support more weight of a second layer. Again, remember that clay is a liquid until it dries, and can only support a limited weight of additional plaster before it tries to flow off the wall. If your plaster is slumping or falling off the wall, it is probably too thick (or your clay surface below is not adequately damp).

Walls become sensuously shaped with sculpted elements. Credit: Sigi Koko
Sculpting
This second coat of clay is also the layer that I sculpt into, including niches, wall reliefs, and any clay frames around truth windows. For thick reliefs, I add a lot of chopped straw, making almost a cob-like mixture. I make sure my surface is saturated with water, and I build up slowly, perhaps 1″ in thickness at a time. If I’m feeling impatient, I use burlap embedded into the surface of the sculpting clay, and I use the burlap to bridge the thick new clay onto the existing wall surface.

Using burlap at window sills to prevent cracking. Credit: Sigi Koko
Burlap
I use burlap (known in the UK as hessian) mostly as a preventative measure in places where cracks are most likely to develop, or where the additional strength of surface fibre will be a benefit. I also use burlap to apply clay plaster to surfaces that otherwise are too slick for plaster to adhere to, such as wood. So at windows, I use burlap embedded into the surface of the second coat of plaster to prevent horizontal cracking along the bottom edge of the window sill, as well as at the joints between the jambs and the sill (and the jambs and the window head). The burlap provides exceptional surface tension, and holds the clay together as it dries, so that it cannot crack in those vulnerable locations. The important trick is that the burlap must be fully embedded into the surface of the clay, otherwise it is not bonded and you actually create a loose spot instead of a strong surface.

Burlap must embed completely into the clay. Credit: Sigi Koko
I also use burlap where plaster meets wood, and I don’t want the plaster to shrink away from the wood, wherever I worry about wide cracks translating into my finish coat, and wherever I want to plaster over a slick surface, like a wood post, any rigid foam, or any roofing felt. I had one workshop participant declare “burlap is like magic!”, and I pretty much agree!

Leave a 1/4″ reveal at electrical boxes for finish plaster. Credit: Sigi Koko
Electrical
Finally a quick note about electrical boxes. I work the placement of all electrical boxes while installing this second sculpting layer of plaster. I straighten boxes, I pull them out if they are recessed too far, I push them in if they are bulging way past the plane of my wall. My goal is a level box that sticks out with an even 1/8″ to 1/4″ reveal from the plane of my 2nd coat of plaster. Then I can run my finish coat of plaster right up flush with the electrical box, and the cover plates will fit on squarely and tight to the wall surface. It’s also not a bad idea to put a bit of tape over the screw holes to keep mud out.
I’d love to hear other people’s experiences and tips! So please feel free to add comments below.
Find the original post over on the Build Naturally blog here.
 About the author
Sigi Koko is the principal designer at Down to Earth Design, which she founded in 1998 to help her clients manifest their dreams of living in a natural, healthy home. She also teaches natural building workshops that empower her clients to contribute creatively during the construction of their own home. You can find out more about her work on her website and blog.

