As autumn draws in, sweet chestnut season is soon approaching. Bushcraft teacher David Willis shares how he bakes tasty roasted sweet chestnut bread on an open fire in a cast iron Dutch oven.
It’ll come as no surprise to those that know me, that baking bread is something I love to do. Whilst you can certainly bake a good loaf in your oven at home, baking your bread over a campfire is something really special. For me, it’s the process that brings such joy: the gathering of firewood and kindling, and the lighting of the fire, that brings the expectation of the bread to be eaten.

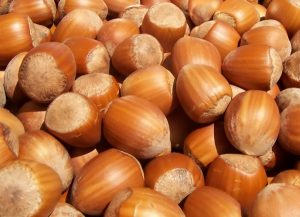
Sweet chestnuts pan-roasting
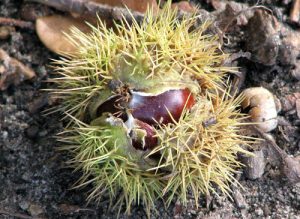
With such a hoard of sweet chestnuts, and some nice big ones to boot, I needed to do something with these lovely, sweet and tasty nuts. Ah ha I thought, how about a sweet chestnut loaf! The best ideas come when sitting by a campfire – that’s for sure!
The first task was to roast those chestnuts – you need to make a small cut into the shell to avoid them exploding. Yes, they really do explode! When roasting some recently, one escaped being slit and exploded with an almighty bang. I wanted to ensure they were all good to eat and no dodgy ones would spoil the bake. So, I halved all the chestnuts and chucked out any that didn’t past muster.
The roasting was done in a small cast-iron pot, it has a lid, which was used. A little olive oil was poured into the warmed pot, the nuts added and stirred to coat them in the oil. Then a little hot water from the kettle was poured in and the pot sealed with the lid. I roasted them for about 20 minutes and then, well, I just had to taste a few!
Bread making and baking…
I warmed some water for the yeast and mixed up a classic loaf with strong bread flour, a little salt and that yeast once it had frothed nicely. I used a spoonful of sugar and a pinch of flour to feed the yeast. With the dough well mixed, those sweet chestnuts were added and rolled in with a glug or two of olive oil.
The well-kneaded dough was put in the warmed Dutch oven to prove. I tend to keep it suspended above the campfire, at a height that means it will keep warm but not start to bake. 30 minutes later – I check, it’s risen nicely, I knock it back and we go again. After the second prove it’s time to bake. The oven is lowered and embers put on the top to bake the bread. Dutch ovens have a rim around the lid to stop the embers falling off.

Sweet chestnut bread part-baked
On the first check, the loaf was pale and under baked. It had been baking for 25 minutes, which with a hot oven would be fine, but today the weather was very cold, so back in it went. This time the oven was placed directly on the embers and the ember-glowing log-ends placed on top. Care is needed doing this, because with the intensity of the heat there is a possibility of over-baking and burning the bread.

Finishing the bake
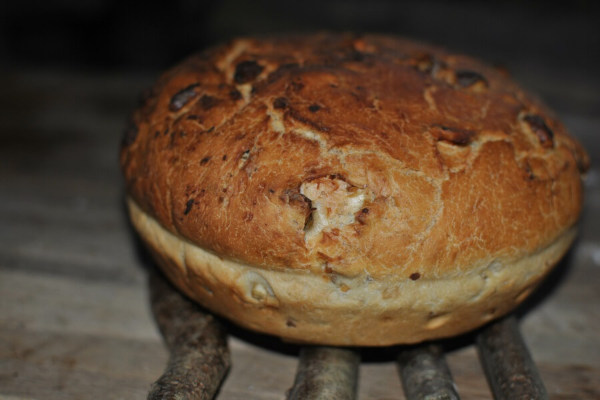
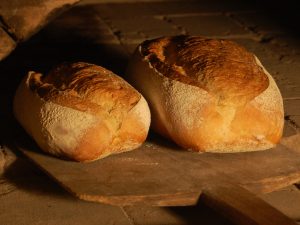
The reveal was 20 minutes later, with a nicely browned loaf. Tapping the bottom provided a reassuring hollowness and confirmation that the sweet chestnut bread was baked and ready to eat!

Golden brown finished loaf
David’s top tip for baking with a Dutch oven
Dutch ovens are fab for campfire cooking. The cast iron dissipates the heat throughout the pan, but there is still a possibility of the bottom getting too hot and burning the contents. For baking, place the dough in a separate pan inside the Dutch oven, supporting it on a few green sticks or stones. This will raise the dough up from the bottom of the oven, allowing hot air to circulate (as it would in a conventional oven), and provide a more even bake without burning its bottom.
During the winter months baking will most likely take a little longer due to the colder weather – but don’t let that stop you, your fresh bread will still taste great. Happy baking!
Oh and, yes, the folks I shared that sweet chestnut loaf with thought it tasted rather good.

Find the original post here on David Willis’ blog.
 About the author
David Willis is a teacher of bushcraft and wilderness living skills. He can be found baking bread and rustling up tasty meals over a campfire, whittling spoons, foraging for edibles, walking in the woods and soaking up everything nature has to offer. He provides fun, informative and educational courses that teach wilderness living skills, natural history and woodland crafts at Bushcraft with David Willis.

2 Comments
Hi Dave, reading about your sweet chestnut bread made me salivate and determined to make next sweet chestnut season. What has stopped me using them in the past has been the pure frustration of processing. Can you tell me what your strategy is?
homeminderukMarcia McGrail – yes, processing those chestnuts can be rather time consuming, I guess you just have to know that they will be delicious when you finish them! The method I used (above) worked well, I cut them all in half and then roasted the nuts for 20 minutes on a reasonably hot fire. Being halved, made it much easier / quicker to shell the nuts, and of course you can check that they fine before roasting. NB. since this article, I now tend to use a trivet under the baking pot rather than sticks or stones, it’s essential to raise the bread of the bottom of the dutch oven otherwise you will get a burnt bottom! Wishing lots of fun with your baking…