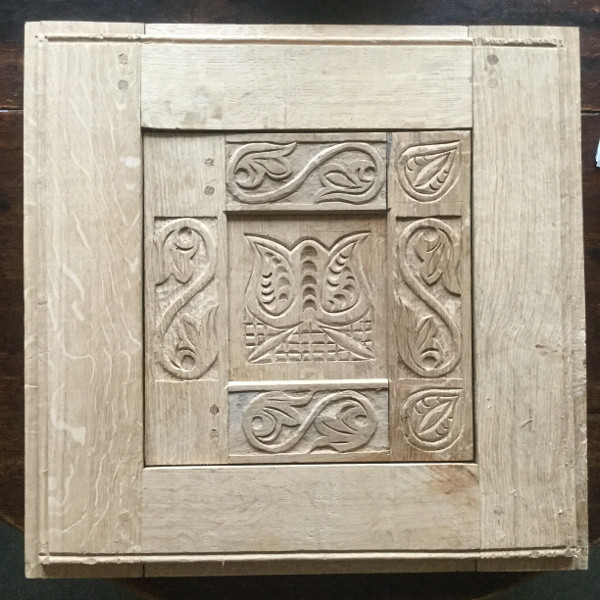
This is a copy of the door to a wall cupboard, or mural cupboard (just the same word but from a Latin stem – posh). I wrote briefly about this local cupboard now in Cliffe Castle Museum here. Wow that was back in November 2014! Well now, I’ve lots of pieces of oak hanging around from past projects so I sorted out eight pieces for the door frame and for the door itself plus a broader piece for the center panel. Then lots of planing to get them all dimensioned, lots of shavings, lots of fire lighting materials, it does burn well does oak, this really is hardly green any longer (better wait until it’s been installed for a while before you get carried away. Ed.).

Some of this stuff too.

I think it best to do most of the carving before assembly. Inevitably, discovered this by error. Working the groove for the panel and then attacking the edges of an S-scroll carving with large chisel and heavy mallet can have rather unwanted consequences. But that’s part of learning. This is the first panel construction I’ve done, and I knew there would be a little frigging around to fill the end of the groove where it exits the stiles with a shoulder on the rail tenons. That turned out not to be too bad. The trickiest part was seating the tenons in the mortises. I must have made a bad decision in opting for 1/8th inch clearance in the mortise bottom. 1 and1/4 inch mortise and 1and 1/8th tenon is a bit close.

Tenons cut, next just been, draw-boring. Bore the mortise and borders the tenons thickness of a shilling closer to the shoulder.

Mark the mortise hole through to the tenon, then bore closer, leaving the top of the hole intersecting the mortise hole so the pegs pull the tenon up tight.

Here are the pegs. Dry oak, they bend through the offset holes.

Much stronger than a board.
Good and neat on the back.
Same process for the frame.
Ready for draw boring.
A touch of edging, and we’re ready for hinges.
Then nailing on’t wall.
Learn more about green woodworking here.

