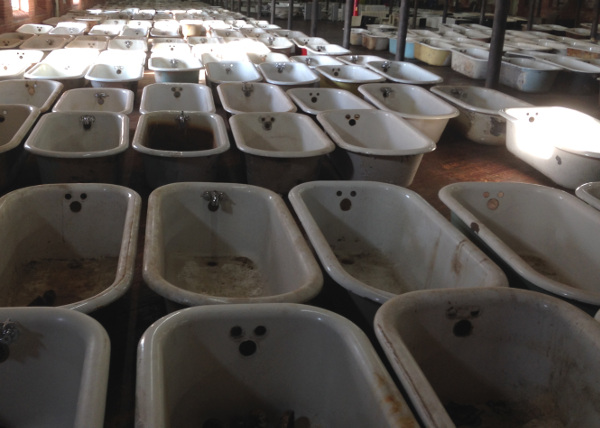
Using salvage building materials brings new life to otherwise discarded items. Reusing materials can inspire creativity and reduce construction costs. But you need to have a plan, or you risk spinning your wheels and burning out from all the leg work involved.
The key to successful salvage hunting and keeping stress to a minimum is start early and have a plan. Below is the process that I share with my clients who want to use salvaged building materials in construction.

This mini guest cottage was built on a mini budget by using salvaged materials nearly everywhere…windows, doors, bathtub, kitchen & bath sinks, counters, cabinets, and more. (The walls are also straw-bale with clay plaster inside.)
Tip 1: get organized
This seems obvious, but is often overlooked. Here’s how I get my client’s organized:
Step One is to make yourself a list of all the materials you will need for your project. This way you know immediately when you see something interesting, whether or not you can use it. This avoids the syndrome of just purchasing items with a “maybe this will work…somewhere..” attitude, which can lead to spending needless time and money.
Step Two is to prioritize your list. You can prioritize in one of two ways:
- by construction timing – which items do you need first, second, third, etc. to keep your construction process flowing smoothly. I think this method works best if your plan is to do your salvage hunting concurrent with the construction process.
- by which items provide the greatest cost savings potential, such as windows, doors, and cabinets. This allows you to start looking for those items that give you the biggest dollar savings for your time spent, and by the time you get to the smaller items on your list, you will be a salvage pro. This method works best if you are at risk of overwhelm…then at least your first efforts give you a good payoff.

This metal railing was reused from another part of the same house.
Step Three is to track your items. I use a spreadsheet with at least the following columns:
item – doors, windows, sinks, flooring, etc.
location – where it will go, ie, bathroom sink, kitchen floor, bedroom window, etc.
minimum size – what is the smallest your item can be
maximum size – what is the largest your item can be
quantity – this isn’t always needed for each item, but for materials like flooring, it’s helpful to know how may square feet you are trying to cover
The goal is to have a shopping list to take with you as you go salvage hunting, with reminders of what you need and any limitations or special needs that each item has. Otherwise it’s like going to the grocery store without a list…you might forget the milk and you might end up with something you never use.

This counter is made from 3″ thick maple, re-purposed from an old bowling alley floor. Total cost was 10% of what new butcher block counters would have cost.
Tip 2: do some research
In order to ensure that you don’t overpay for your salvage items, you will need to do a little bit of research on what your item would cost if you purchased it new. This can feel like a big task when you first start, but you will get the swing of it as you become a salvage hunting expert. If you have a mobile device, you can look up pricing as you shop. There are also times where your goal isn’t cost savings, but rather a particular aesthetic.
Tip 3: don’t give up performance
For items that have a performance requirement, don’t save on upfront costs if it will lead to higher costs down the road. Performance criteria include:
durability – how long will the item last (you don’t want to have to replace the item prematurely)
energy efficiency – will the item impact energy usage; this includes appliances and windows
structural integrity – does the item keep your building standing
For example, if salvage wood will be used structurally, then make sure it is structural grade, shows no sign of rot, is free of compromising holes, etc. For windows, you will want energy efficient, double glazed windows in good condition, otherwise you are committing to higher heating costs for the life of your building. If the windows are used for passive solar gain in the winter, then the windows need NOT have a low-e glazing. For appliances, you still want them to be energy efficient. You get the idea…

All of the windows for this house are high-quality & energy efficient… and yes, they were all salvaged at huge cost savings.
Tip 4: plan for storage
You will need a place to safely store and protect all of the items you salvage until you are ready to use them in construction. Generally you want your items up off the ground, under a shelter, and protected from the weather. Some items may also need to be protected from temperature swings. So have a plan for where you will store your items. Make sure you can access everything, especially the items you will be using first in construction. For windows specifically, be sure to store them standing up, otherwise the glass will break.
Tip 5: put in the time
Salvaging requires quite of bit of time and patience, so keep that in mind as you jump in. And this is why I recommend starting early, so you don’t find yourself overwhelmed by “holy heck, we need this door tomorrow” situations. When you first get started, you may feel overwhelmed, intimidated, scared of making the wrong decisions, etc. This is all normal. So start slow, give yourself plenty of time, and make your first purchase something that feels “safe”. That way you can break the ice, gain confidence, and by the end of the process, you really will feel like a pro.

Final Thoughts…
Some of my favorite applications for salvage materials are:
interior doors – you can often find solid wood doors (sometimes with the old hardware still on them) for a fraction of the cost for a new door
furniture that can be converted into a funky bathroom vanity – for this you can check local yard sales, thrift shops, and even drive by upper income neighborhoods on trash day (you’ll be amazed what you can find)
windows – this is probably the biggest cost-saving potential, but you really need to keep energy efficiency in mind. So I recommend calling local companies that specialize in selling just windows. Ask them if they have a room in the back with “orphan windows” – windows that were purchased new, but were never picked up (mis-ordered, whatever). Often they will be happy to let you comb through their stash and sell you windows at a huge discount.

