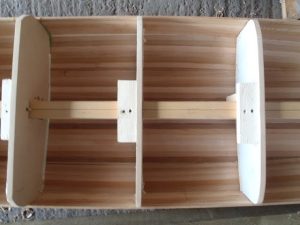
In the third instalment of the building your own sea kayak series, after a long break in the build over the winter the materials have arrived for the next stage of the process. The Petrel’s cockpit is recessed to give it a lower profile, which makes Eskimo rolls easier. The forms are temporally glued to the boat and cockpit area is cut.

Cockpit recess
The recess is made of two pieces assembled using stitch and glue techniques. The recess back lowers the cockpit below the level of the deck. I made the recess out of 3mm marine ply wood.

I then brushed on some epoxy resin and sanded to finish.

The finished recess…

The recess and the deck are then chiseled, planed and sanded to get a neat fit.

The recess is then glued into place ready for the next stage.

I will be sanding and filling this week and hopefully laying on the glass and epoxy over the next week or two.
Sanding & fairing
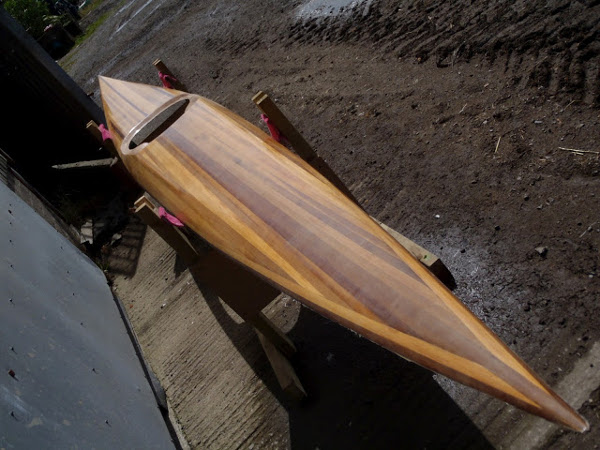
I began the fairing way back before Christmas but then the build went on hold for a good few months. I ordered the fiberglass and today finished the sanding. It was nice enough to move the boat outside in better light and get some decent photos of the whole boat.

I’m pleased with the outcome of the sanding. It has opened up a few of the strips and requires a little filling with some ‘dookie schmutz’.

First I scraped the entire boat with a heavy duty paint scraper, then planed and finally sanded with a random orbital sander using 80,120,180 grit sand paper. I started with 40 grit on the hull as I manged to rip some of the strips with the plane.


The next stage will be to roll on a thin undercoat of epoxy resin before laying on the fiberglass. To do this I’m using 130g plain weave fiberglass. Then it’s flip the boat open and start on the inside, this way the separated deck and hull parts will be rigid enough to plane and sand.
Seal coat
A seal coat is a layer of epoxy applied to the boat before laying down the fiberglass to limit the absorption of epoxy when wetting out the glass later. It also adds an extra layer of protection and therefore more weight. Some people lay a seal coat, some don’t. As I am taking my time this layer will protect the wood while it sits about in a dusty cattle shed.
I first take the hull off the forms to prevent any drips from the deck running down.

I’m using West System’s 205/105 hardener/epoxy as recommended.

The deck was a bit of a nightmare. I mixed up a small quantity of epoxy, poured it on and spread it about with a squeegee. The result was a thick gooey mess.

Practice makes perfect I guess. For future reference don’t use so much epoxy.

However from a distance it doesn’t look too bad.

Four sanding disks later and I’m still nowhere near getting a smooth clean finish.

I run out of disks and take the deck off the forms. I couldn’t resist taking this first opportunity to sit between the cockpit. Quite a special moment…my first glimpse of what my build might look like when paddling.

Hull back on the forms and a quick sand and brush off and it’s on with the epoxy. This time I used a roller and spread the layer very very thinly. It’s looks lovely and really brings out the colour of the wood.

Hopefully once the hull has set it won’t need much sanding – unlike the deck, which is going to take some time.


Next stage fibreglassing…cant wait!
Fibreglassing the deck
A busy work and home schedule has put my boat build on hold. I went up the farm to find it covered in a thick layer of dust. We were having a dry spell and it looked guaranteed to be dry for the next few days. So I took a gamble and loaded the boat up on the van to work on at home.

The last thing I did was add an undercoat of resin to the outside of the deck and hull. This turned out a bit of a mess up to say the least so I spent hours sanding it back to the wood.
Back up the farm on a wet day to minimise the chance of dust – a last bit of fine sanding and a clean down and it was time to lay on the glass. The fibreglass comes in a woven fabric. This fabric is draped over the boat and cut to size. It is then lightly brushed to get out any folds and creases. A mix of epoxy and resin is then painted on with a roller, just enough to wet out the cloth.

Notice how the fibreglass weave is now clear once wetted out. It was left to dry for three hours. I then brushed on another layer of epoxy/resin as a fill coat to fill in the gaps in the weave.

The finished result. Not bad for my first go, a good sand, varnish and polish should see it shining, but that will come later.

The hull has been sanded back to the wood and is due to be glassed in the next couple of days, once I’ve fixed a split in one of the strips.


Once I have glassed the outside I have to plane, scrape and sand the inside before glassing also. Then I can build up the cockpit coaming, cut the hatches and install the skeg. Both halves will then be glassed together and bulkheads, footrests and seat installed ready to grace the water.
On-board video of the Petrel in action.
Part 2 is here.


