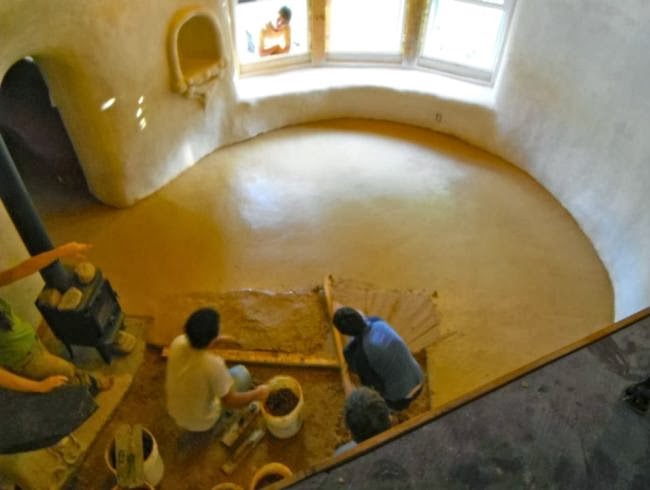
Natural builder Sigi Koko of Down to Earth Design shares how to build an adobe floor. In Part 1, we learn about the substrate through to the insulation layer critical for any earthen floor.
Seems crazy, right? A dirt floor, of all things! Well, time for a perception shift. Adobe floors are lusciously beautiful and quite durable. And best of all, in most regions they can be made from local clay soil, which makes them dirt cheap (sorry, couldn’t resist!).
The concept
An adobe floor, or earthen floor, relies on the sticky binding properties of clay, one of the most versatile building materials I know of. Clay expands when wet, creating sticky platelet particles, like a bunch of suction cups. Add to the clay ample course sand, to increase compressive strength and control shrinkage as the clay dries. Finally add fibre, to increase tensile strength and knit everything together, like reinforcing bar in concrete. The finish mix is essentially the same as adobe or cob. And the installation is similar to a concrete slab, only without the environmental impacts or cold nature of cement.
What I describe below is the method I use to install an adobe floor. It is by no means the only method! I recommend reading with the intention to gain an understanding of the concept and the function that each layer serves. This way you can adjust and experiment while being sure to include the primary functional characteristics (most particularly to keep moisture out of the floor).
The layers
A typical adobe floor includes a build-up of layers, each with a purpose. I describe each layer below, including the function it serves and (in some cases) alternatives you can experiment with. This example demonstrates a floor installed “on grade”, similar to a concrete slab. You can also install the adobe on a framed floor, but be sure to stiffen the joist framing to minimise flex, otherwise your floor will crack over time. There are a variety of methods for building up the floor layers, from single pours to multi-layered finishes. I am sharing a basic version that is conceptually similar to pouring a concrete slab. I find that this system performs extremely well and is very forgiving to install.
So, starting from the bottom up…
1. The substrate
You want your floor to rest on solid ground (or a stiff framed floor with little flex). If you have movement below, it means cracks up above. So you want structurally strong, compacted earth to build on. The ground should be free of topsoil or high organic matter, since the organics will continue to decompose and shrink in volume over time, leaving you with voids below your adobe floor. So dig down until the soil feels solid and compact. You may even want to go over the ground with a hand tamper to ensure compaction.
2. The capillary break
Next you install several inches of gravel to provide a capillary break that prevents any potential liquid water in the ground from rising up into the floor. I use 4-6″ of pea gravel or angular 1-inch stone. If you live somewhere where pumice is commonplace (or any insulating mineral/rock), you can substitute the pumice for the stone & the insulation (#4), since the pumice will provide both qualities.
3. The vapour barrier
Next you lay a vapour barrier that covers the entire floor area. This provides your final moisture control for the adobe, blocking any air-borne vapour (from evaporated ground moisture). I use 6mm polyethylene sheeting for this, exactly what is used to prepare a concrete slab. The plastic is obviously not natural, but it is excellent insurance.
4. The insulation
This is probably the layer that is most often left out, but it can dictate the energy performance & your comfort level. If you live in an exclusively hot climate, then you can skip the insulation, because a cool floor is beneficial. But if you heat your building at all then you want to keep the heat inside. If you do not have insulation below your floor, then you are, in effect, heating the endless thermal mass of the ground below!
I use R-10 insulation for a typical floor and bump up to R-15 if the floor will have radiant heating in it. You want that heat to follow the path of least resistance into your space, not down into the ground. And you need that insulation to be non-biodegradable, otherwise it will compost under your floor and disappear over time, leaving you with a cracked & heaving floor. This is one place where I will use rigid foam, since the reduction in energy over time quickly offsets the impact of the foam manufacture. For a natural alternative, you can use rock wool insulation or an insulating mineral, such as pumice or perlite.
In Part 2 we’ll move on to cover the base layer.
Find the original post here on Sigi Koko’s Building Naturally blog.
 About the author
Sigi Koko is the principal designer at Down to Earth Design, which she founded in 1998 to help her clients manifest their dreams of living in a natural, healthy home. She also teaches natural building workshops that empower her clients to contribute creatively during the construction of their own home. You can find out more about her work on her website and blog.




2 Comments
We are building an earthbag home and will do an earthen floor. We have built it on French drain foundations (and the first 2 layers below ground and 3 above ground are gravel) and we have high humidity and are debating whether the vapour barrier is a good idea or a bad idea due to mould concerns. What do you think?
Thank you for this blog!
Hi @Judsweiser – just replying on behalf of Sigi here who tells me that yes, a vapour barrier is always a good idea!